A boy mom who loves DIY. I sew my own wardrobe and I also own a small batch apparel cut and sew company. My days are long and busy but I love connecting with other moms, wives and women entrepreneurs (that's my tribe).
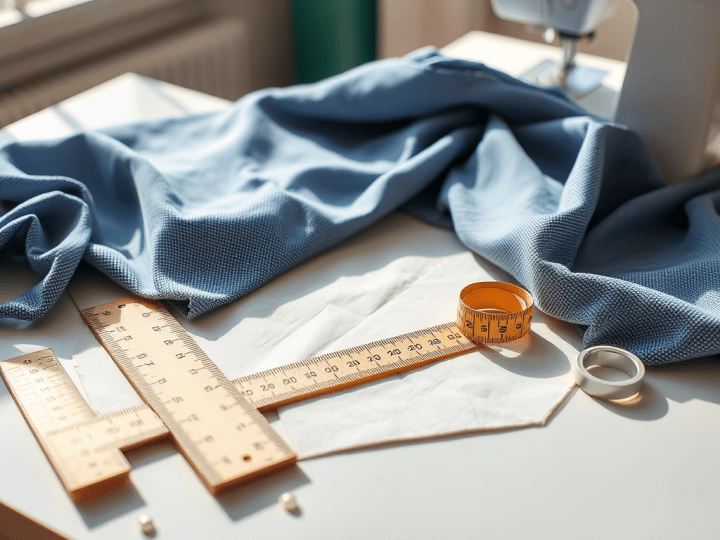
*”Learn How to Draft a Basic Two-Dart Skirt Block: Step-by-Step Tutorial for Beginners!”* Discover the secrets to creating a perfectly fitted two-dart skirt block in this easy-to-follow tutorial! Whether you’re a beginner in pattern making or a fashion enthusiast looking to sharpen your skills, this video breaks down the process into simple steps. You’ll learn: -The necessary tools for getting started
How to take body measurements for a flawless fit.
how to calculate for the perfect dart.
Key drafting techniques for precision and professional results.
By the end of this video, you’ll have a strong foundation for creating a basic skirt block for a skirt that fits beautifully. Ready to bring your designs to life? Grab your tools and let’s get started! 💡 *Subscribe for more fashion design tips, pattern-making tutorials, and creative inspiration!* 📌 *Leave a comment below with your pattern-making goals or questions—we’d love to hear from you!*#patternmakingforfashiondesign#patternmakingforbeginners#basicskirtpatterntutorial
As a designer I believe that fabric and textiles are arguably one of the biggest muses to fashion and product design as a whole. There is just something about the mood and feeling that fabric can invoke that inspires a designer to create wearable art. Some textile prints are considered timeless and will always be a staple in design; Houndstooth is certainly one of those fabrics. Now I could be bias because it is one of my favorite diagonal weave textiles but its hard to argue its timelessness.
With origins dating somewhere between 360 AD and 100 AC in low land Scotland; houndstooth was usually made out of wool (although nowadays the print can be seen on almost any type of fabric) and worn as outer wear for shepherds. The name “Houndstooth” was essentially coined because of the prints resemblance to the shape of a dogs tooth.
Houndstooth became more popular in fashion and mainstream apparel sometime in the 1930s and it’s still finding its place on Runways and on store racks today.
This two-toned textile ; also known as “Shepherds Check”, made one of it’s first appearances on the high fashion scene in Christian Diors 1948 Haute Couture S/S collection. Although originally seen in black and white; houndstooth can now be seen in different color and scale variations throughout fashion.
Houndstooths emergence on the fashion scene all those years ago was as a symbol of wealth and class and it still exudes such elegance and sophistication today.
One The RunwayThis Year
Coach showed this timeless print in their S/S 22 Collection in a beautiful blue and off white tone.
Photo: Filippo Fior / Gorunway.com; Kelly Donoghue (left), Emma Peet (RIght)
Looks from Coach SS 22 Runway
How I Houndstooth (My Recreate)
I myself have started adding this classic print to my wardrobe with a recreate of a houndstooth suit by Wolk Morais that Viola Davis wore on the cover of InStyle in 2020.
Photo Credit: Nakia Young-EL, Nakia Young-EL
Shop Houndstooth Looks
You can find Houndstooth looks to add to your wardrobe by doing a simple Google search. The options are endless and their are a million different ways this fabric has been used to create pieces that will speak to your personal style and wardrobe. Check out a couple options below:
Stay tuned for more Fashion News, Wardrobe & Styling Tips, Sewing DIYs and all things fashion by subscribing to our blog and following me @nakiayoungel on IG and Facebook.
One of my goals for the new year is to really tap back into the creative side of fashion and fashion design. The thing that initially drew me into fashion was the fact that it was a way to creatively express oneself.
I remember when I was growing up, every time we went to the grocery store I had to get a fashion magazine. I loved flipping through the pages and seeing the editorial photography, the creativity of the designs and styling, the creativity of the photo itself. I think after I started learning the technical aspects of Fashion Design and garment construction I strayed way from using my designs as a creative expression and more as a display of my technical skill (of course there is a way to do both).
This year I am determined to find that sweet spot between creative expression and display of skill. My social media profile has been changing and its feeling more and more “ME”.
This design I made for a recent “Me-Made Monday” turned out better than I expected and the response from my IG family was amazing. I used a fabric from my company “Ferrell Fabric” that really served as the main muse for the entire look. The fabric is a reversible sweater knit fabric with an abstract print.
Make sure you follow me on IG @nakiayoungel ;that’s where all the magic is happening.
Hey Lovlies! I’m back with the first post of 2022!!!! Things are finally settling down in my life and I’m finally in a better headspace to start writing again. This wont be a long post; just a Happy New Year and a stay tuned for all the exciting things to come!
So… Happy New Year!!!!!
I wont bore you with a holiday (or end of the year) recap but I’ll just say this; aside from losing of my grandmother right before Christmas, the holiday break was nice and relaxing and I was able to spend much needed QUALITY TIME with my family.
The end of 2021 was really rough but throughout that time I was really able to access and focus in on what is truly important to me; my family and my art. I came into the new year feeling like I was regaining a pulse on what I really want in life, who I am now and most importantly who I want to be.
I am really excited for all the new opportunities and experiences this new year will bring. I have some major goals that I want to accomplish I am determined to achieve them; no excuses.
Stay tuned for all of the wonderful things I have planned for this blog and the Young-LifestyEL brand.
Be Blessed!
Make sure ( if you haven’t already)to connect with me on IG @nakiayoungel
Hey my lovelies! Its that spooky time of year again! My husband and I had absolutely no plans for Halloween this year outside of watching scary movies with drinks!
We’ve actually been watching scary movies all throughout October gearing up to Halloween day which was very fun and entertaining. We watched everything from the original Candy Man movies to Nightmare of Elm Street and even an old old film called “The Blob”. Aside from just being able spend some quality time together it was very nostalgic to watch films from the 80s and early 90s.
But I digress, this post isn’t about all the classic horror films we’ve watched this month; its about drinks! I wanted to start trying some holiday themed cocktails and decided that Halloween would be a great place to start.
Here are two delicious Halloween themed cocktails I made for our Halloween night in.
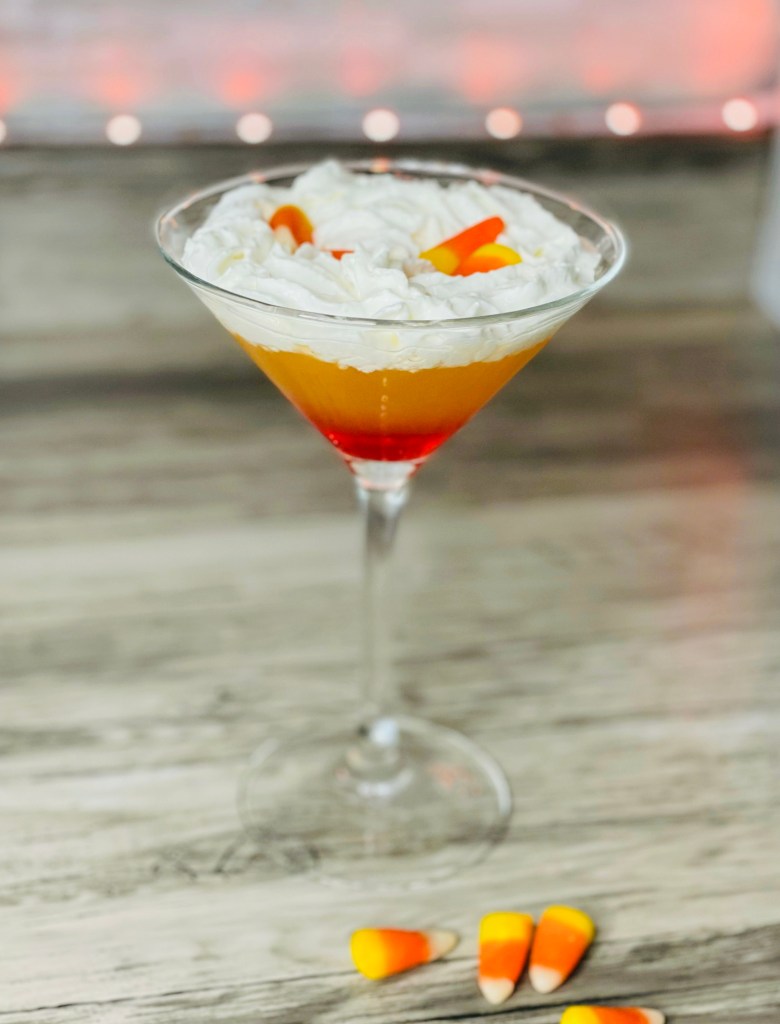
Candy Corn Martini
Ingredients:
1.5 ounce of Whipped Vodka
3/4 ounce of Grenadine
1 ounce of Pineapple Juice
2 ounces of Sparking peach juice (I used the ‘Sparkling Ice” peach flavor but you can also use peach flavor Izze)
Whipped cream (garnish)
Candy Corn (garnish)
This Martini is super easy to make. You begin by adding the Vodka and Pineapple juice to a beverage shaker. Add Ice and Mix. Strain/Pour into your Martini glass. Next you will add the Sparkling Peach Juice. Add the grenadine ( it will sink to the bottom of the glass). Then top off the Martini with some whipped cream and candy corn to garnish.
Its as simple as that. When I tell you that this drink was so delicious I am not kidding. Although it does not actually taste like candy corn; it taste like a creamsicle to me, it certainly looks the part.
The next drink I sort of improvised and it actually turned out pretty good. Originally I wanted to do a Black Martini (owwww spooky); however, I couldn’t find a few of the ingredients that I needed so I just created something entirely different. I named this drink “Vampires’ Kiss Martini).
Vampires’ Kiss
Ingredients:
2 ounces of Vodka (I used Pineapple Ciroc)
1/2 ounce of Black Raspberry liqueur
3/4 ounce of Grenadine
This Martini is even easier and quicker to make than the Candy Corn Martini.
Mix the vodka and black raspberry liqueur in a beverage shaker. Add ice and Shake. Strain/Pour into Martini glass and then add Grenadine. Voila! You have yourself a “Vampires’Kiss Martini”. Although I thought this drink turned out well I still haven’t perfected it yet. So give it a try and tell me what you think in the comments. All of my professional and home mixologist, if you think of a way to make this drink even better drop a comment too.
I have been focusing heavily lately on making the best of what I have and creating the life I that want with what I currently have instead of constantly thinking about the things that I don’t have. Don’t get me wrong, I still aspire to have the things I’ve always dreamt of having but I’m also being more intentional about appreciating the now.
My dream home is a Farm House style home. I just love the décor, the layout and the entire feel of these style homes. Unfortunately, right now my husband are not looking to buy a new home until we figure out what we are going to do with the house that we currently own. We have been going back and forth about whether we will continue to rent it out our ultimately sell it so until we figure our next steps we will stay in the 4 bedroom house we’re renting. Now its no mystery that this home is NOT my dream house but I recently decided that that doesn’t mean we can’t make it into a space we love in the meantime.
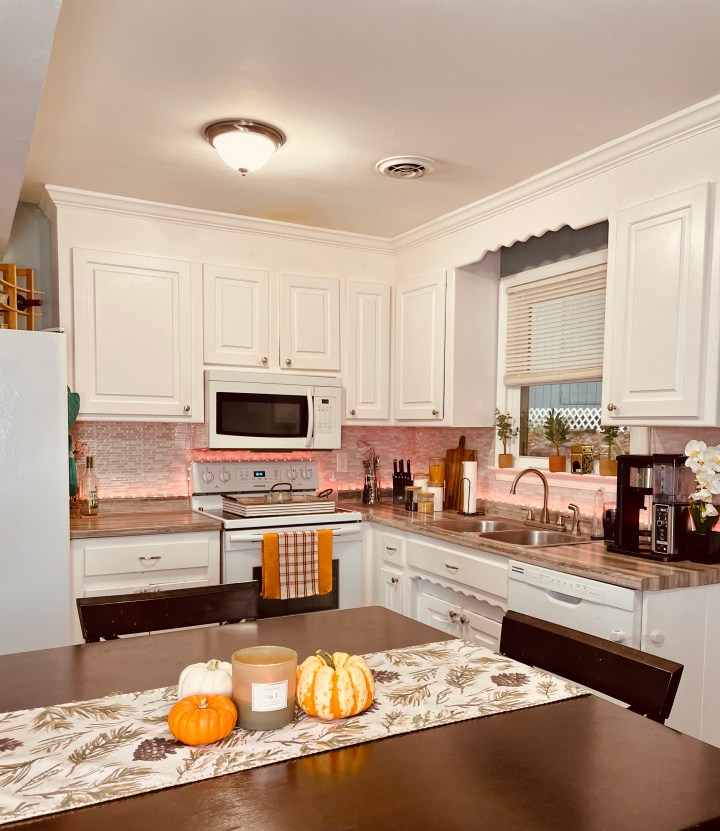
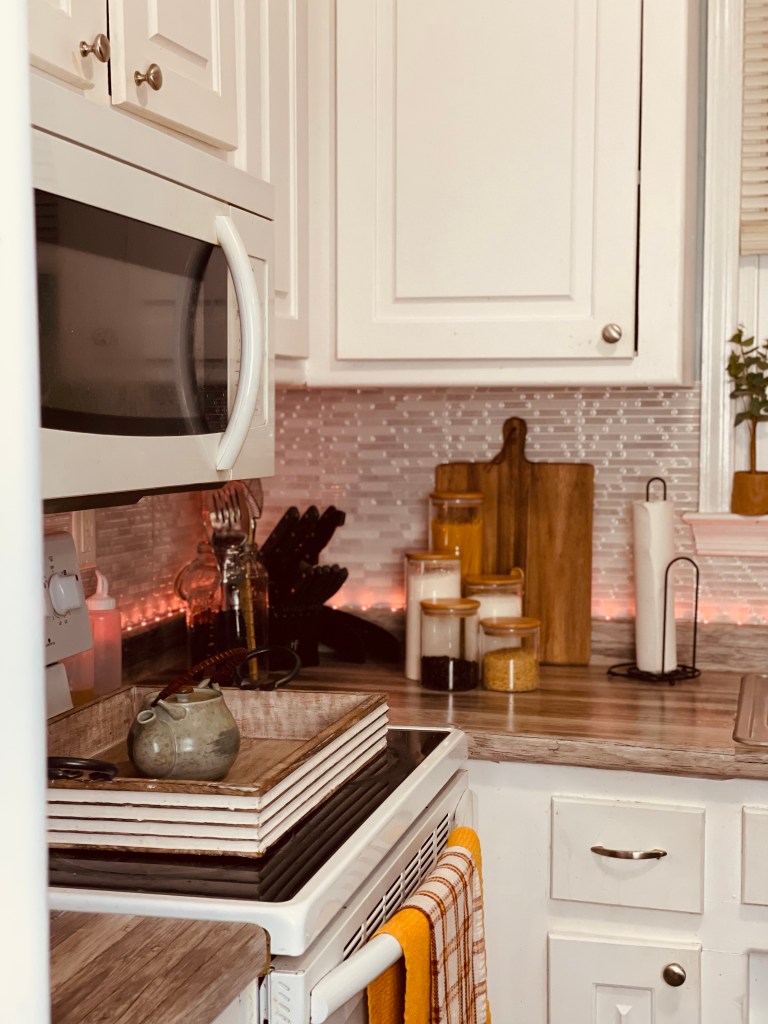
I’m determined to go room by room and redecorate this space into something that truly feels like us. I’m starting to spend more and more time in the kitchen so the first room to get the Young LifestyEL revamp was…you guessed it… our kitchen!
I wanted to give the kitchen a little “facelift” but since we are renting I couldn’t make any permanent or major changes. I also wanted to give it Farm House feel without breaking the bank.
Take a look and see what the hubby and I were able to do without spending a ton of money.
This is the before video of the kitchen
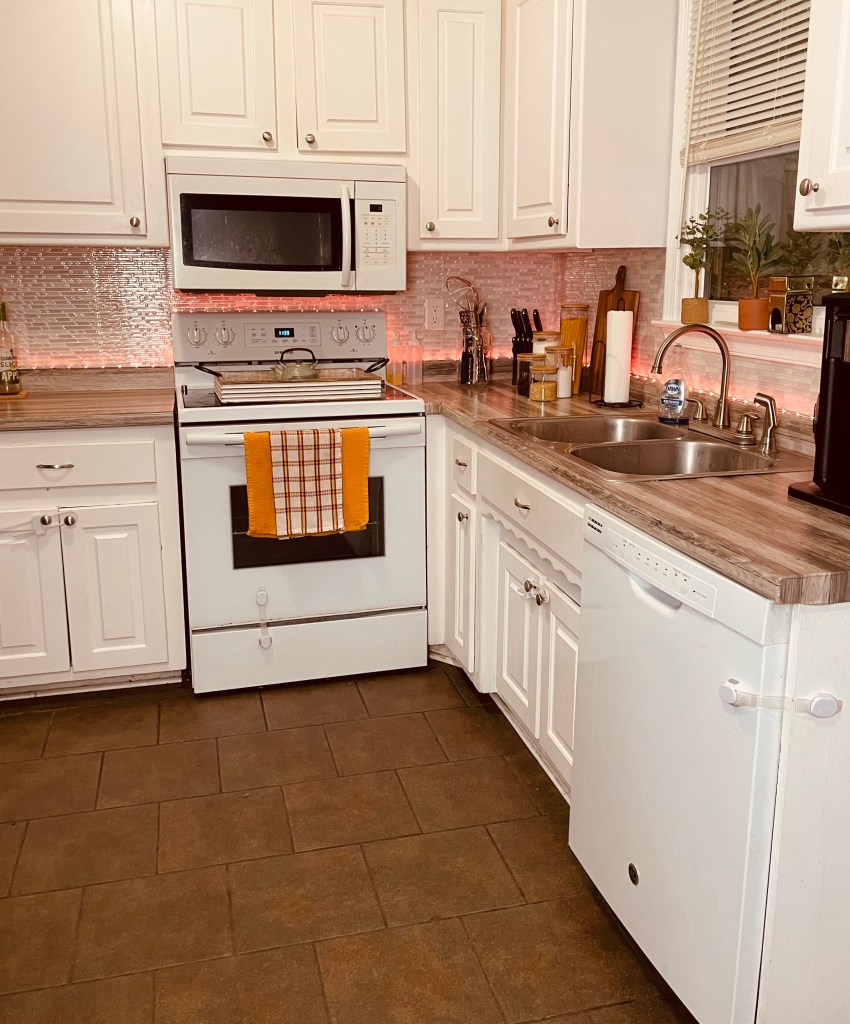
Check out the counter covering we used here and the backsplash we used here
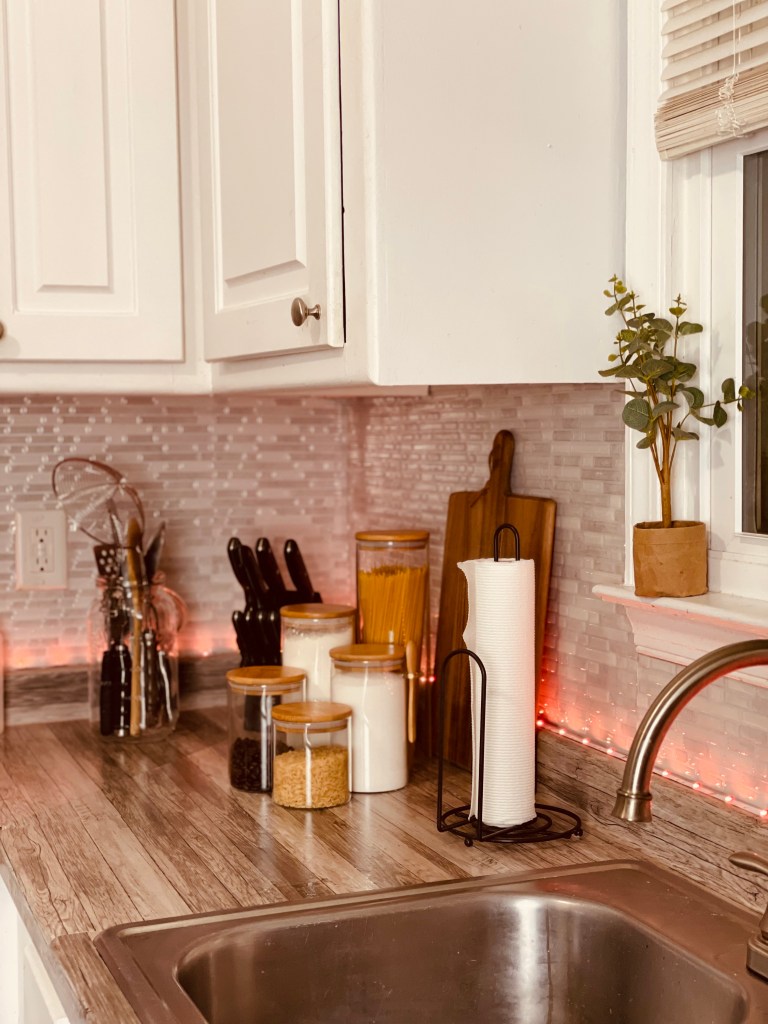
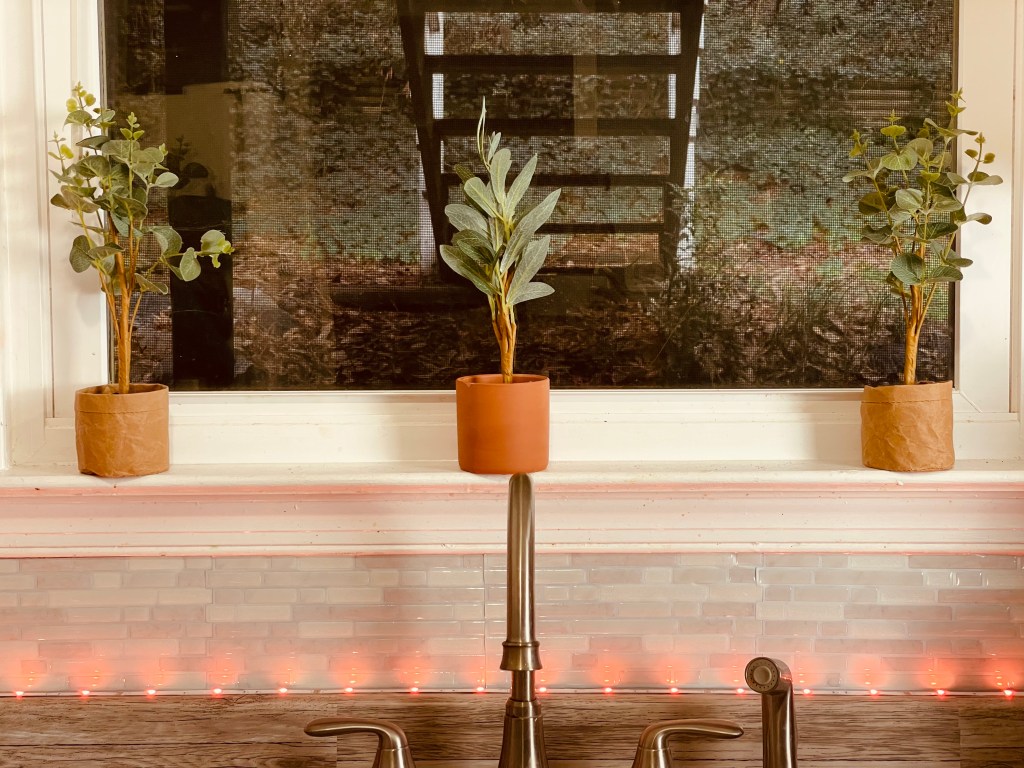
We got these three Faux house plants from Target for like $3 each and that add the perfect touch of greenery. We also used some LED lights that we already had that we purchased from Amazon here
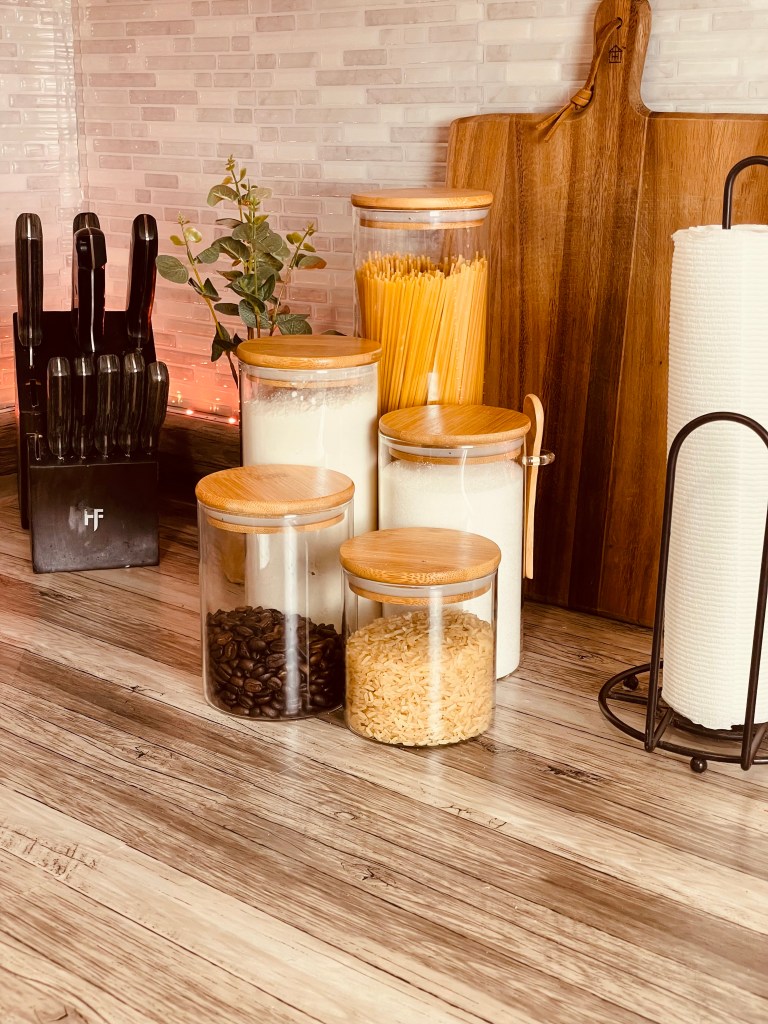
If you know me you know I LOVE my coffee
Our backsplash is completely removable as well as the peel and stick counter covering that we used. We wanted to make sure that any changes that we did make could easily be removed when we leave so that the kitchen can return to its original look. We purchased the removable backsplash from Amazon (Tic Tac Tiles), the Peel and Stick counter covering from Target (Con-Tact Creative Covering). I also purchased the glass jars I used for our pasta, coffee, flour and sugar from Amazon (Glass Jars). Click on any of the hyperlinks of these products to check them out.
This little kitchen revamp cost us less that $100.
I still want to get a few things to organized our little pantry area and will share once that part of the kitchen has been finished.
But I’ll be honest I’m a little obsessed with how the kitchen looks and feels now. How do you think we did?
Recently my husband and I decided to create a homeschool environment for our toddler. Noble is only 2.5 years old but we wanted to start introducing a little routine and an educational atmosphere for him. I decided that we would do a half-day pre-school schedule from around 9AM to 12PM Monday through Friday.
Now, I’m no trained educator so of course I had to do my research on various lesson plans, activities and pre-school appropriate curriculums and although we are only in our second week things have been going well.
One of the hands-on activities that I chose to incorporate into our weekly schedule is Baking. I love to bake but haven’t really been able to do it as much as I would like to. So now, on Wednesdays we bake.
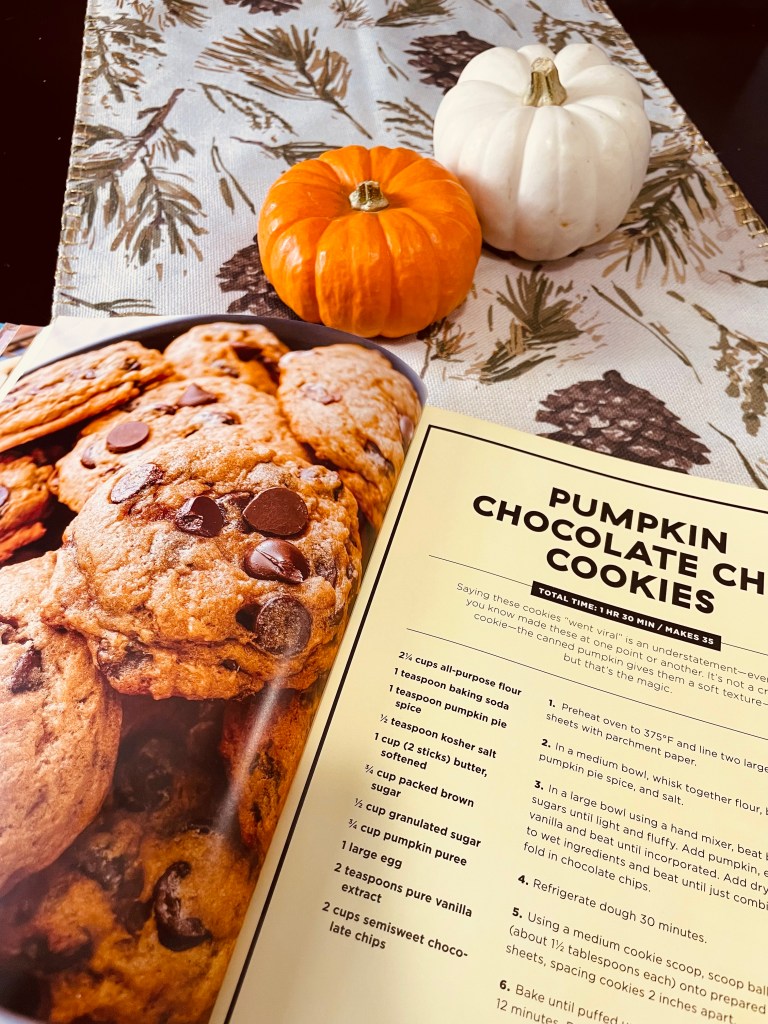
A little while ago I purchased this great dessert recipe book (Delish Insane Sweets by JoAnna Saltz & The Editors of Delish) from Target and I’m determined to try every recipe in the book. This past week Noble and I baked Chocolate Chip Pumpkin Cookies and they were so delicious and easily one of my new favorite Fall treats.
If you are a beginner baker this recipe is pretty easy and quick to make. The recipe calls for the following ingredients:
2 1/4 cup of All Purpose Flour
1 Tsp of Pumpkin Pie Spice
1/2 Tsp of Kosher Salt
1 Tsp baking soda
3/4 Cup of Brown Sugar
1/2 Cup of Granulated Sugar
2 Sticks of Butter
3/4 Cup of Pumpkin Puree
2 Cups of Semisweet Chocolate Chips
2 Tsp of Pure Vanilla Extract
1 Large Egg
Noble enjoying playing in all the ingredients. He also threw Flour at me which you can see the evidence of in my hair.
Before you get started mixing all of your ingredients you will want to preheat your oven to 375 degrees F and line your baking sheets.
The first ingredients you will need to mix together are the baking soda, flour, salt and pumpkin pie spice.
Next you will want to mix together the butter (softened) and the sugars together. Be sure to mix these together in a separate bowl from the flour mixture. Although you can use a hand whisk for this step its probably a lot easier if you use a hand mixer.
Once you have the butter and sugar mixed until its nice and fluffy you can add the egg, vanilla, and pumpkin puree. Once these ingredients are mixed well you can add the flour, baking soda and pumpkin pie spice mixture to it.
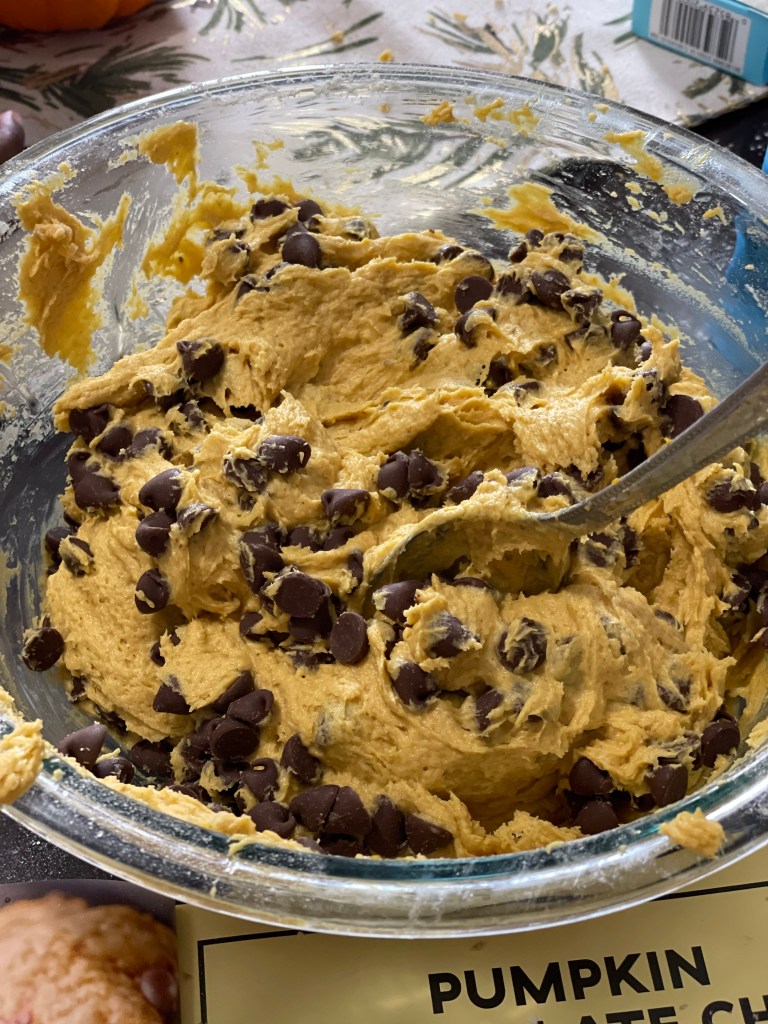
The last thing you will mix is are the Chocolate chips (yum). You will want to make sure to fold the chocolate chips into the mixture (do not use hand mixer or whisk for this step),
Once all the ingredients have been mixed together place the mixture in the refrigerator for about 30 minutes.
After 30 minutes take the cookie dough mixture out and scoop out small balls of dough to place on your baking sheets (size of cookie dough balls will depend on how big you want the cookies). Also make sure to spread the cookies apart by about 2 inches or so.
Lastly, you will bake each batch for about 12 minutes.
When I tell you that these cookies are so soft and so tasty I am not kidding.
They are definitely a great option for any Fall festivities and gatherings or if you simply just love all things Pumpkin flavored and sweet.
Is it just me or have the weeks been flying by in September? Maybe it’s because this month has been super busy but I feel like one minute its Monday and then I blink and its Friday already.
I don’t know what it is but I do know one thing ; Thank God it’s Friday!!! One way I love to unwind after a long week is to pour a glass of wine and find something good to watch on TV.
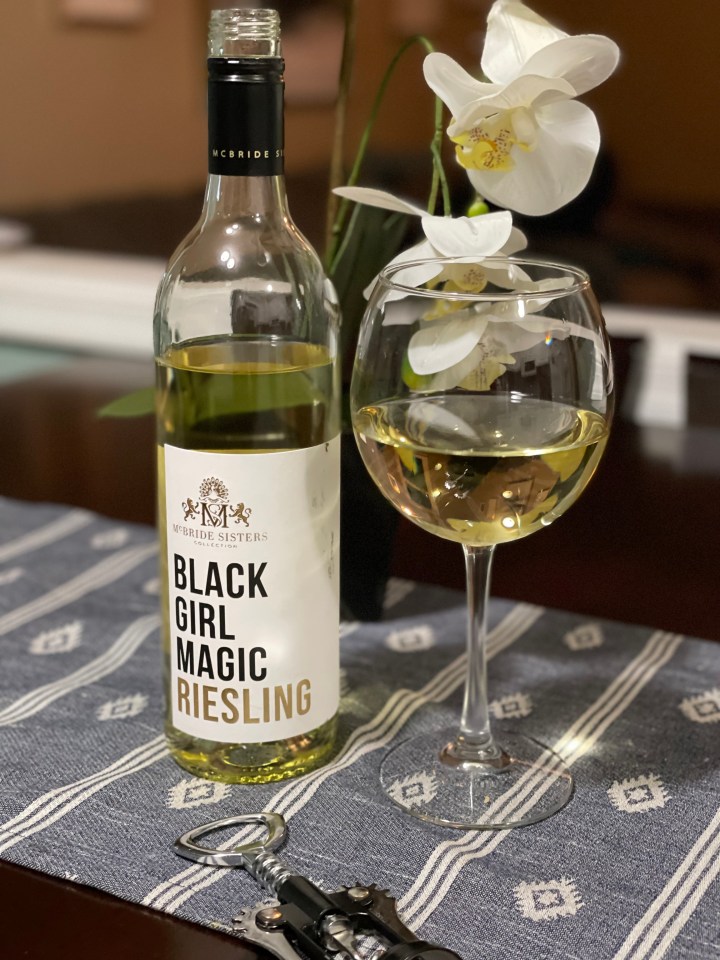
My choice for tonight is a wine from the McBride Sisters. I purchased a bottle of their Riesling and their Red Blend from Target recently. I have been wanting to try this brand ever since I learned that it was black owned. And let me tell you it does not disappoint. Now I’m no Wine Connoisseur but I know a good glass of wine when I have one and these wines were pretty good.
I usually tend to go with a red wine if we’re eating a red meat for dinner (or if its just been a Reaaaallly long week). If we’re having chicken or a white sauce pasta dish I tend to go with a nice white wine.
The McBride Riesling has just the right amount of sweetness (but not too sweet) and has such a nice crisp refreshing taste especially when served chilled. Their Red Blend has a nice body, a little tart with just a a tinge of sweetness.
Whether you are a Red or White wine lover, I definitely recommend trying this Brand and when you do let me know what your thoughts are!
Oh and for all my other wine lovers, drop some wine recommendations for me because I’m ALWAYS ready to try a new wine!
The most challenging part of being a full-time, stay-at-home mompreneur is the juggling act I constantly have to play. Mommy, playmate, lunch lady, cleaning lady, wife, dinner cook; the list goes on, and all of this on top of running a business.
As you can imagine getting overwhelmed and stressed is not hard to do when wearing so many hats all the time. One way that I’ve tried to keep things simple is by picking quick and easy dinner recipes that I can whip together in an hour or less.
One of my favorite choices for dinner is fish simply because there are so many different types and different ways to prepare it.
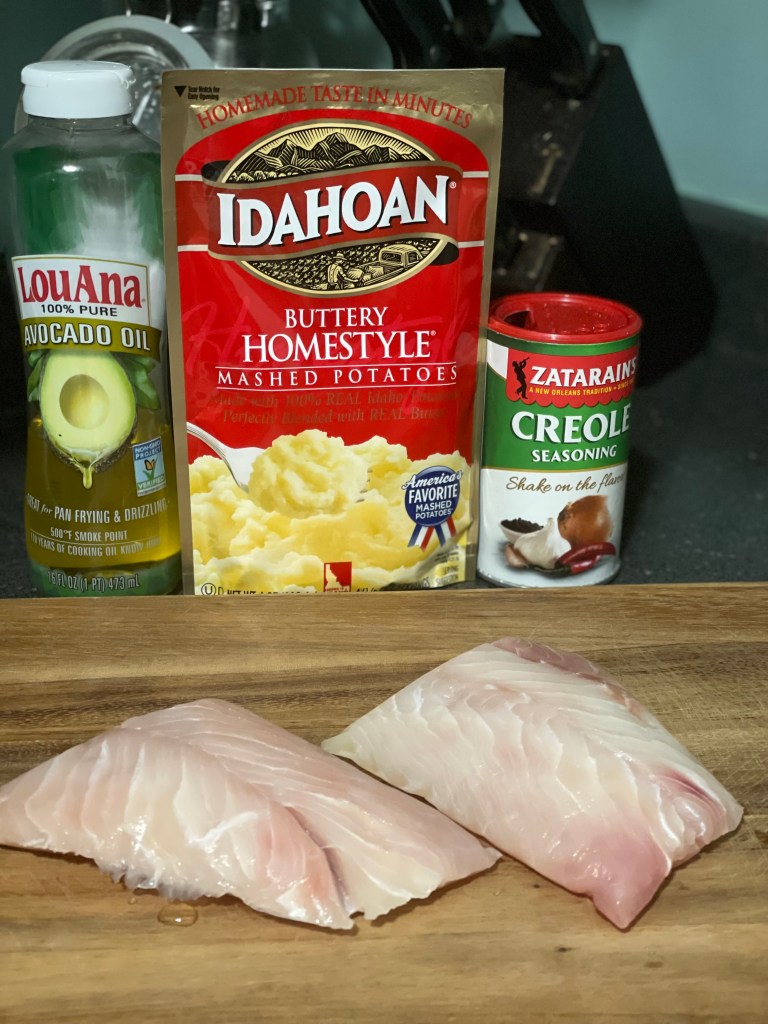
Recently the hubby bought some Red Snapper and I made a quick dinner with less than 10 ingredients that turned out deliciously.
As much as I would love to say that I am the type of cook to peel my potatoes and mash them myself, lets be honest; the way my life is set up there’s no way lol. So my favorite go to are the Idahoan Instant potatoes (which are so tasty by the way).
Now I do usually like to google a nice seasoning recipe for whatever protein we’re having for dinner but on this particular day I just decided to use some Creole seasoning and keep it quick and easy.
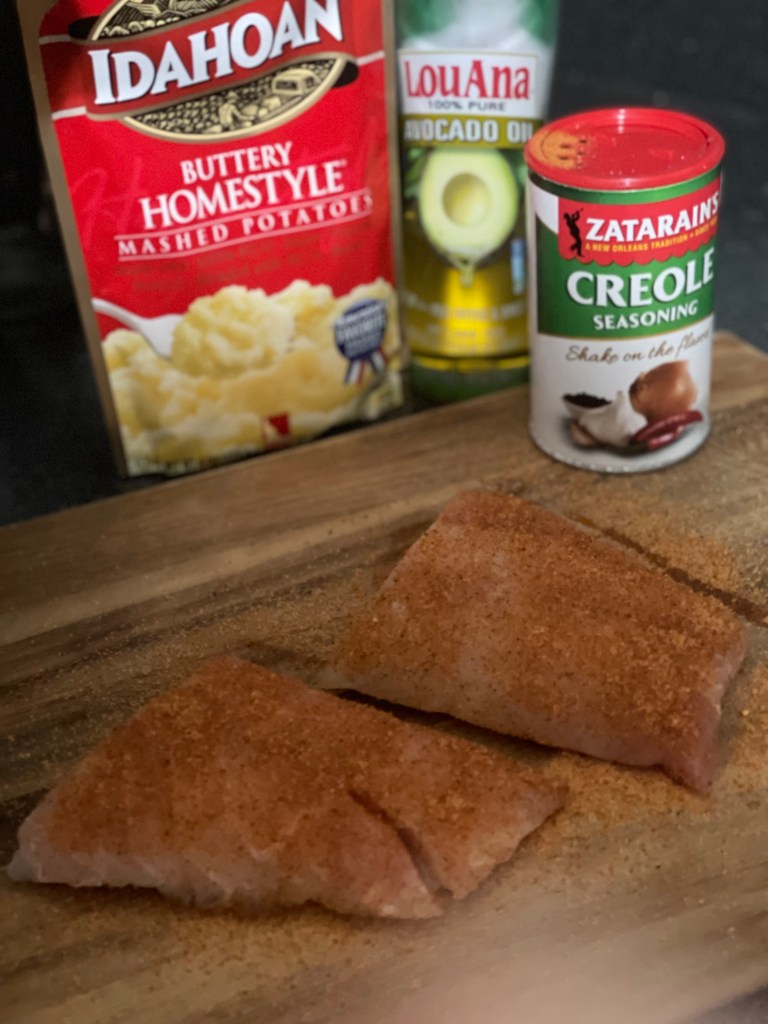
I started by cleaning my Snapper and patted the filets dry with a paper towel.
Then I lightly brushed each filet with Avocado oil (not a lot) before evenly sprinkling the Creole seasoning on each side of both filets.
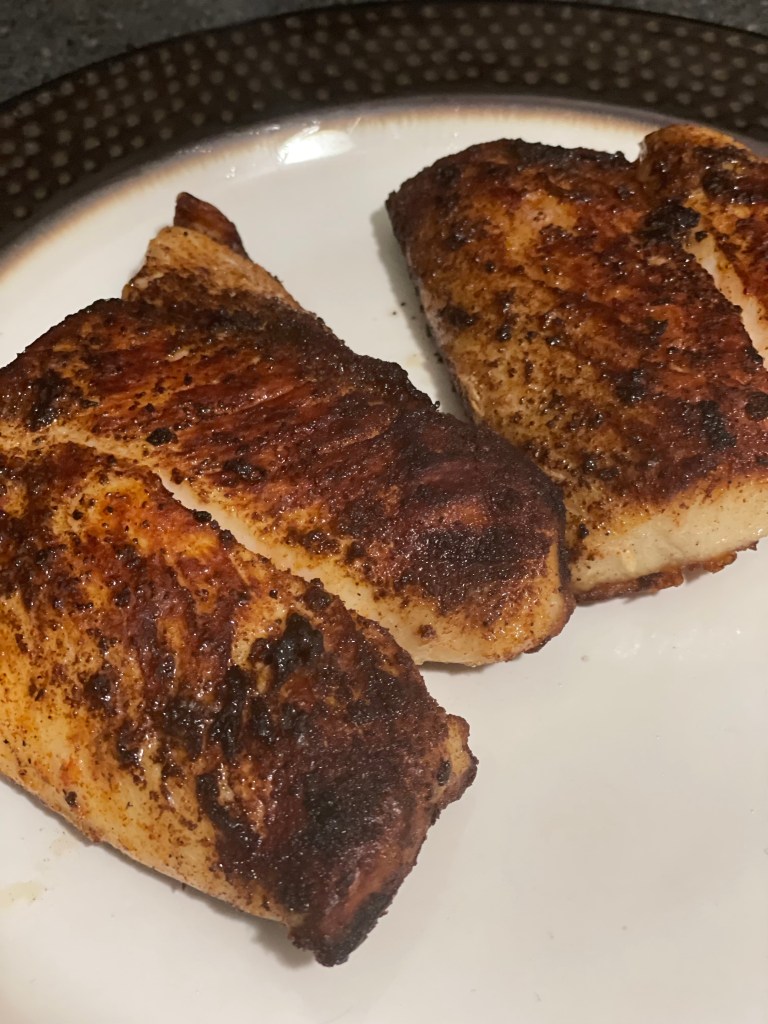
Since this was my first time making Red Snapper I looked up the best way to cook it; there were a few options but I ultimately decided on pan searing it.
To start, I put just enough Avocado oil in my pan to coat the bottom of it and placed the pan on medium heat. Once the oil was hot enough I placed each filet in the oil. I cooked the filets until they were blacked on each side and fully cooked all the way through.
After the Snapper was finished I put2 cups of water in a pot and brought it to a boil. Once the water was boilingI removed it from the burner and poured in my instant Idahoan Buttery Homestyle Potatoes, gave them a good stir and just like that they were all finished and ready to go ( you literally cannot beat that).
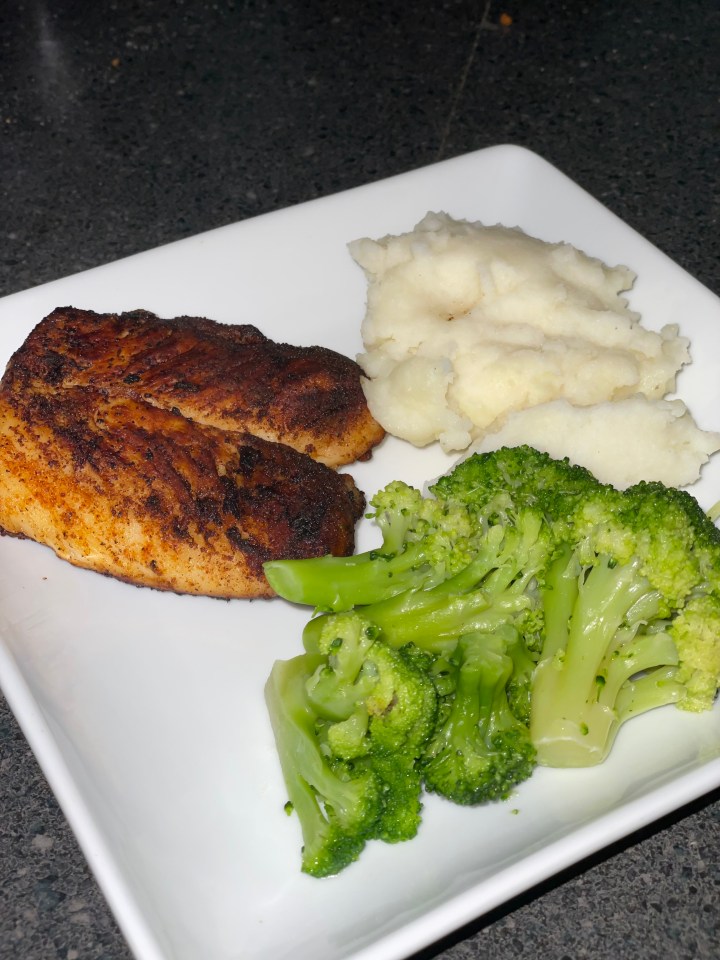
Lastly, I steamed some broccoli and added some butter and salt to taste . In just about 45 minutes I had made a delicious dinner that the whole family loved.
Blackened Snapper, Potatoes and Broccoli
If you are looking for a quick and easy dinner option try your had at some pan seared snapper . Grab a bag of Idahoan instant potatoes (they have some great flavors) and if you want to make it really quick you can get the steamable bags of broccoli that you can just throw in the microwave for 4.5 minutes.
So I did a thing! As my cut and sew company N. Young-EL Design House (NYDH) approached our 1 year mark I launched another business. I know it sounds crazy right? However, my new business actually goes hand in hand with what NYDH already does.
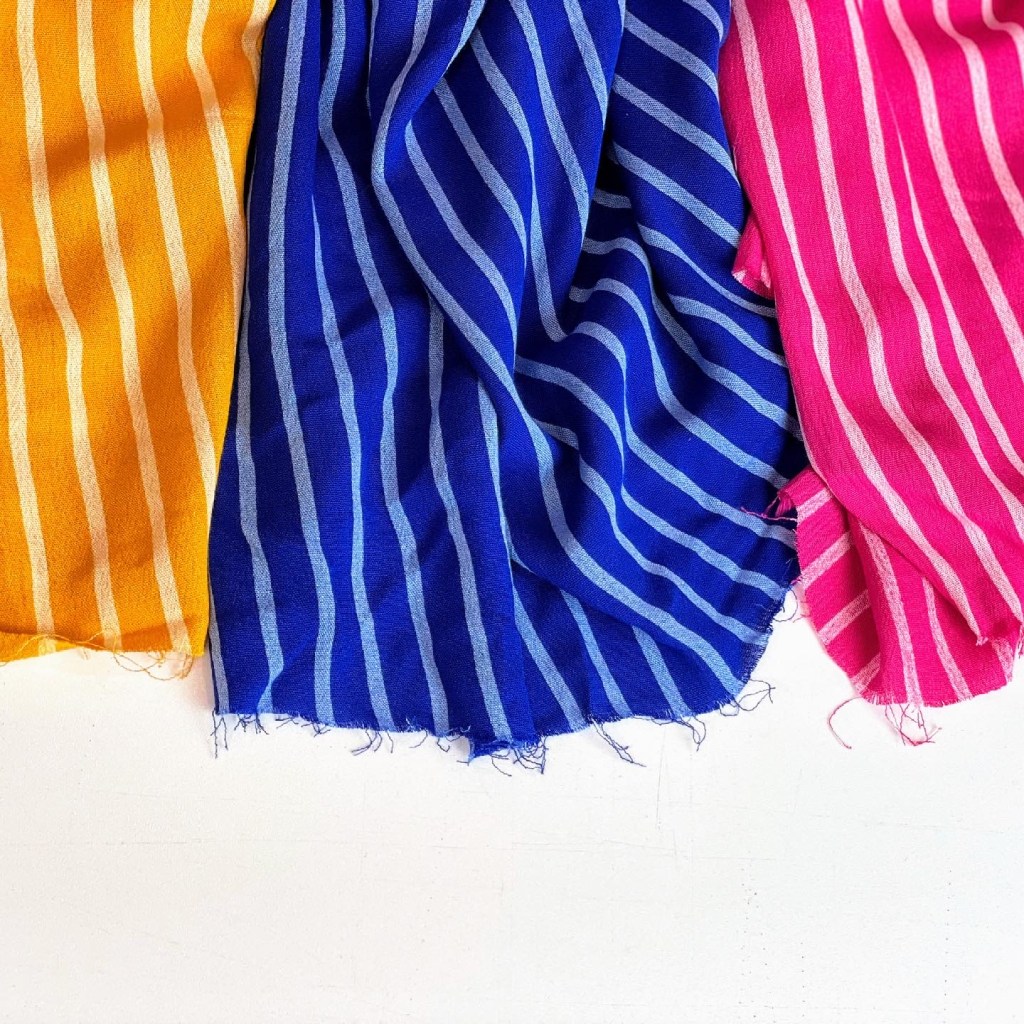
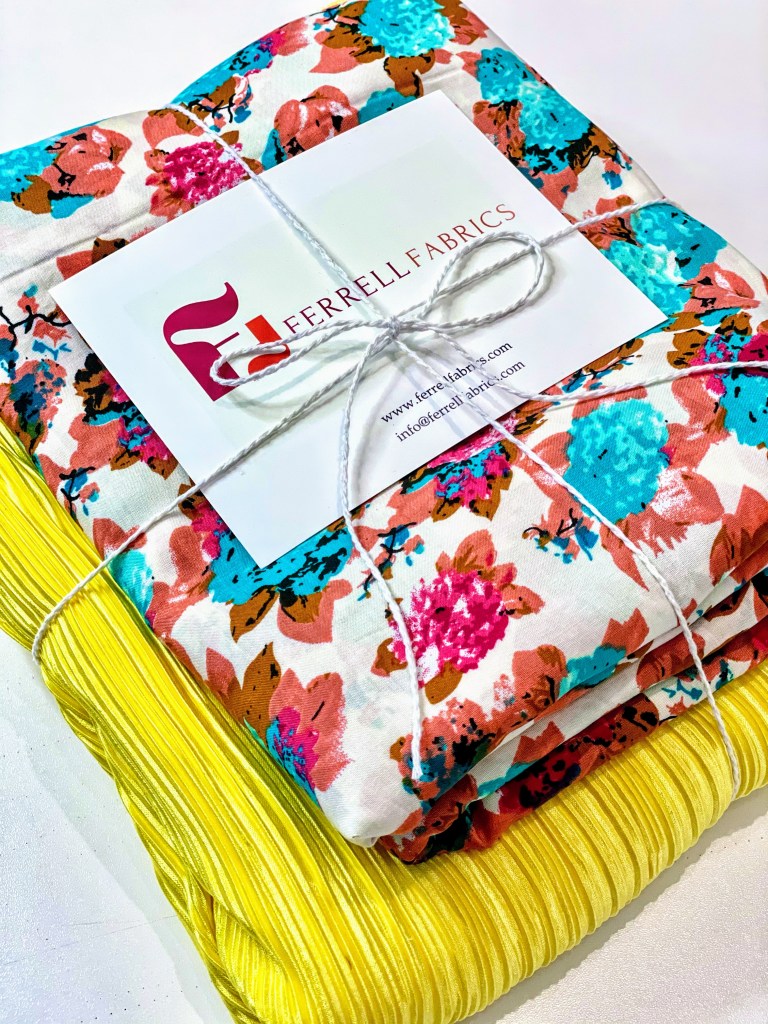
I opened an online fabric shop!!!!!!!!
Over the past year I have been able to build amazing relationships with great fabric suppliers while assisting clients with sourcing fabrics and trims for their collections. I came to found that I actually really loved fabric sourcing, and well, I’ve loved fabrics since I first started to sew almost 20 years ago.
I wanted to create an online fabric shop for the modern day home sewers and designers alike. My main focus is to provide beautiful, quality fabrics at affordable prices. I decided to launch Ferrell Fabrics in May of this year. We’re only a few months in and have gotten quite a few orders which I am very excited about. I have so many great ideas about what I want Ferrell Fabrics to become and what I want it to contribute to the sewing community; this is only the beginning.
Although it has only been a few months since we launched I am hoping that by the beginning of 2022 we will be able to open a brick and mortar location. We have so much to tackle before we can do that but I am excited for what’s to come.
I hope you all will come along for this crazy ride! You can visit us online at www.ferrellfabrics.com , and on Instagram & Facebook @ferrellfabrics .
I will be sharing m journey of building a fabric store so stay tuned!